Sunday, December 30, 2012

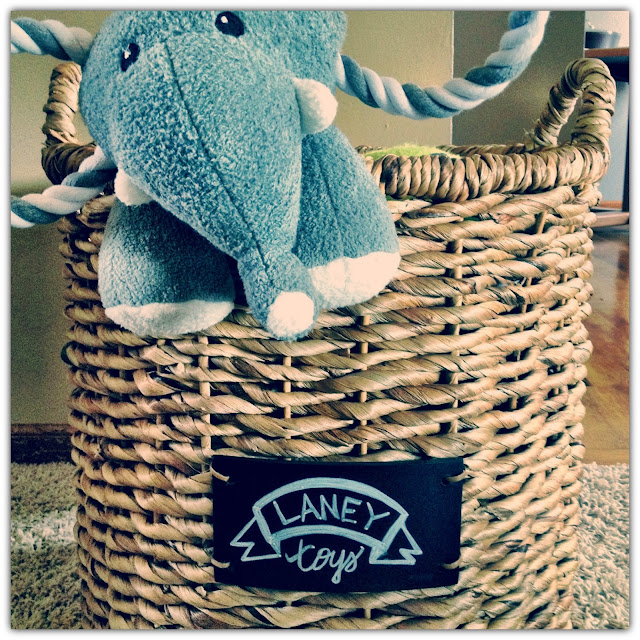
Laney's Toy Basket

It's not secret that our family {all of Chris's family and all of my family} treat our pets like actual children.  With the holidays, our pets get completely spoiled.  Yes, some may think it's a little overboard, but we have fun with it.  

Right before the holidays, Laney's old toy basket was overflowing with toys and it just wasn't big enough.  I wanted to find a basket that was a little larger and that would look decent being out in the family room.  I came across this little beauty - the chalkboard tag already attached.  I just colored her name onto the tag & filled the basket with her toys.  She loves it {of course because it is able to fit more toys and tennis balls in it!}. 


Saturday, December 29, 2012

Christmas Eve Quiche & Maple Bacon


A couple weeks ago, my sister & I went to a cooking class together.  It was our second time taking a cooking class with this instructor.  The first class we went to was Thanksgiving themed.  The second class we went to was a brunch theme.  We both really enjoyed the classes and are looking forward to trying out some more!  What I really love about the classes and the recipes that we have used to cook with, is that the recipes are very simple and do not require tons of ingredients or time to prep.  However, they turn out delicious and very impressive!  

I decided to make a couple of the recipes from the brunch class for Christmas Eve dinner.  Chris & I don't really have any Christmas Eve traditions (sad, I know).  It has been hard with my job because some years I have to work on Christmas Eve.  But, maybe now we can start a tradition of brunch/breakfast food for Christmas Eve! 

Christmas Eve Quiche

1 pastry crust
4 eggs
1 1/4 c. Half & Half (you can use milk, but it won't be as creamy)
Salt & Pepper
1/4 tsp. cayenne pepper
1 c. white cheddar cheese, shredded (Tilamook is delicious)
2 Tbsp. chives, minced

Preheat oven to 325ºF. 

In a mixing bowl, whisk together eggs, half & half, salt & pepper, cayenne pepper.  Set to side. 
Roll out pie dough and place in pie dish, crimping the edge for the pie-like appearance. 
Sprinkle the shredded cheese and chives around the bottom of the pie shell.  Then, pour in the egg mixture.  
Bake for 45 minutes. 

Mapled Bacon

1 pkg bacon (I like to use turkey bacon or center cut)
2 Tsbp. real maple syrup

Preheat oven to 400ºF.

Line a glass baking dish with foil, make sure completely covered (I used my 13x9 glass Pyrex dishes). 
Place layer of bacon on top of foil.  Bake for 15-20 minutes.  Brush bacon slices with maple syrup and bake for another 5 minutes. 

*Lining dishes with foil and baking bacon in the oven is a much easier way to cook bacon.  It makes for easy clean up and you don't have the splatter of bacon grease all on top of your stove.

Enjoy!!!

Sunday, December 9, 2012

Christmas Cookies & Candy {2012}


Christmas Cookies & Candy {2012}

I'm so excited to write this post!  Last year, I made a whole bunch of cookies and candy and when I tried to remember everything I baked, I had a hard time.  Now I will have all of it documented and can look back next year on what I made!  It will help me to decide which ones I should make again and which ones I should omit -- which will allow me to try new recipes! 

I will share each recipe with you - so beware, this is a long post.  In the following picture I have numbered all the candy and cookies so you can correlate the number to the recipe (in case there was any confusion). 


{1}

Chocolate Crinkle Cookies

These are made from cake batter, surprise! They are perfect for Christmas Cookie making because of the convenience.

1 box Devil's Food Cake mix
1/4 c. canola oil
2 eggs
Powdered sugar to roll 

Preheat oven to 350ºF and line cookie sheet with parchment paper.

Combine cake mix, canola oil, and eggs in a large mixing bowl.  Mix together with spoon (batter will get a bit thick and greasy). 

Pour powdered sugar in small bowl.  Roll dough to form balls, then roll into powdered sugar.  Place on cookie sheet.

Bake for approx 12 minutes. 

These are good to keep in the freezer! 

{2}

Cake Batter Fudge


2 c. + 2 Tbsp yellow or white cake mix
2 c. powdered sugar
1/2 c (1 stick) salted butter, cut into 4 pieces
1/4 c milk
2/3 c white chocolate chips
1/2 c rainbow sprinkles

Spray 8x8 baking pan with non-stick cooking spray.

Mix together cake mix and powdered sugar in a large bowl.  Add mix and butter (do not stir them in) and microwave for 2 minutes.  Once done, immediately begin mixing everything together - the batter will be very thick.  

Fold in white chocolate chips and sprinkles, stir gently (you do not wan the sprinkles to leak their color into the fudge).  Spoon the mixture into baking pan, level out the top.  Chill in the refrigerator for at least 2 hours.  Cut into squares.  Store in fridge.
{3}

Sweet & Salty Chocolate Cups

1.5 c. peanuts
1.5 c. chocolate chips
1.5 c. butterscotch chips
1 bag of Lays potato chips, crushed

Melt the chocolate chips and butterscotch chips in a large bowl in the microwave, about 2 minutes.
Mix in the chips and peanuts to the melted mixture.  Keep mixing until all combined.  

Scoop by large spoonful into cupcake liners (place liners on a large baking sheet, it will be easier to transfer to refrigerator or freezer to cool)- you can use either small or large, it doesn't matter.  I used a mixture of both.  Place in fridge, or freezer, until cooled.  Store in refrigerator until ready to eat. 


{4}

White Chocolate Peanut & Chip Bark

1 package of white chocolate almond bark
1 container of peanuts (cocktail)
1 bag of Baked! Ruffles, lightly crushed

Melt almond bark (either on stove top or in microwavable bowl).  Once melted, stir in peanuts and chips.  The amount is to your liking!

Line baking sheet with parchment paper.  Pour onto parchment paper and place in refrigerator until cooled and hardened.  Then, break apart in pieces.  Store in fridge. 

{5}

White Chocolate Peanut & M&M Bark

1 package of white chocolate almond bark
1 container of cocktail peanuts
1 bag of M&Ms

Melt almond bark (either on stove top or in microwavable bowl).  Once melted, stir in peanuts and M&Ms.  The amount is to your liking!

Line baking sheet with parchment paper.  Pour onto parchment paper and place in refrigerator until cooled and hardened.  Then, break apart in pieces.  Store in fridge. 

{6}

Fudge

1 1/2 c. sugar
2/3 c. evaporated milk
2 Tbsp butter (or margarine)
1/4 tsp salt
2 c. mini marshmallows
1 1/2 c. semi-sweet chocolate chips
1 tsp vanilla extract

Line 8x8 baking pan with foil. 

Combine: sugar, evaporated milk, butter, and salt in a medium-sized sauce pan.  Bring to a boil over medium heat, stirring constantly.  Boil, stirring constantly (or else it will scorch), for 4-5 minutes.  Then, remove from heat.

Stir in marshmallows, chocolate chips, vanilla (and other add ins you may like, such as walnuts).  Stir vigorously for 1 minute, or until everything is smooth and well combined.  Pour into lined baking pan and refrigerate for 2 hours, or until firm.  Lift from pan (using the foil) and cut into desired pieces.  Remove foil.  Store in fridge. 

*I added some M&Ms that I had left over to the tops of half of the pan.

{7}

Minty M&M Pretzel Bites

1 bag of mini pretzels
1 bag of Wilton's peppermint candy (I find them at Wal Mart during the holiday season, I cannot find the peppermint kind anywhere else throughout the year)
1 bag of M&Ms

Preheat oven to 325ºF.

Line baking sheet with foil.  Arrange pretzels on baking sheet and top each pretzel with a candy.  Place in oven for 3-5 minutes, until the candy starts to melt (don't let it melt all the way, otherwise it will seep through the pretzel).  Take out of oven, press M&M into top.

Slide foil off of baking sheet and let cool for at least 1-2 hours.  Store in air-tight container in fridge. 

{8}

Snickerdoodles

Here is another cake mix cookie! Similar to the Chocolate Crinkles!

1 package white cake mix (or yellow works great, too!)
1/4 c. oil
2 eggs
1/2 tsp ground nutmeg

For rolling:
1/4 c. sugar
2 tsp ground cinnamon

Preheat oven to 350ºF.  Line baking sheet with parchment paper. 

In a large bowl, mix together cake mix, oil, eggs, and nutmeg - with a wooden spoon.  (Once again, the mixture will be thick and may be a little greasy feeling.)

In a small bowl, combine the sugar and cinnamon.

Roll the dough into 1-inch balls and then roll in the sugar-cinnamon mixture to coat.  

Place on baking sheets and bake for 10-12 minutes.  Do not over bake. 
Remove from oven and cool. 

Again, I find these cookies are great to store in the freezer.  Once you are ready for one, grab one from the freezer and it will soften up in just a couple minutes!

{9}

Christmas Magic Bars

1/2 c. butter, melted
1 1/2 c. graham cracker crumbs
1 (14 oz) can sweetened condensed milk
2 c. semi-sweet chocolate chips
1 1/3 c. flaked coconut
1 c. M&M, holiday version

Preheat oven to 350ºF.  Coat 9x13 baking pan with Pam (non-stick cooking spray)

Combine the graham cracker crumbs and butter - press into the bottom of pan.  Pour sweetened condensed milk evenly over the crumb mixture.  Then, layer evenly with chocolate chips, coconut, and M&Ms.  Press down firmly.  Bake 25 minutes, or until lightly browned.  Cut into bars.  Store in air-tight container (at room temp or in fridge).


Hope you enjoy all these recipes!!!

Saturday, December 1, 2012

DIY: Lighted Christmas Package

DIY: Lighted Christmas Package

A couple days ago, I was at Hobby Lobby & Michael's shopping for Christmas decorations.  I stumbled upon a lighted glass box similar to the one I made - the price was something around $35.00, I believe.  I could tell that it was an "in-store" project and so I asked someone if they sold the glass box in store.  I bought the glass box for $11.99.  At home, I already had thick ribbon, a strand of lights, and the little decor accent that you see in the photo.  So, I made it a DIY project. It's super easy and I love lights during the holiday season, so this project was perfect for me!

The glass box is called a Krafty Blok.  Maybe I live in a hole, but I had never seen these before.  
{Source: Hobby Lobby} - click on link 

If you google Krafty Blok, it will show you tons of different projects you can do with these.  They are perfect for all sorts of holidays - you can get very creative!  These blocks have a cut out on the bottom of them that allows you to stuff things inside (i.e. ribbon, lights, little accent pieces):


After I stuffed the stand of lights inside, I left a little slack so that it could be plugged into the wall.  Then I wrapped it with ribbon and tied the accent piece on the in middle.  Easy as that!  After the holidays, I plan on gathering up some ideas on how to re-use for other holidays throughout the year!! 

Tuesday, November 27, 2012

Baked Apple Pie - In an Apple


For Thanksgiving with my family, I was put in charge of the desserts.  I wanted to do something that wasn't extremely heavy because it seems like no one hardly eats desserts after such a big meal.  I created these apple pies, baked in an apple, after I saw it on Pinterest. 

This dessert was a big hit! Everyone loved it.  I only made 4 total, because I had brought along another small dessert; but, I wish I would have made more.  The only challenge I came across when making this was trying to keep the apples from browning.  I know there are tricks and techniques out there to prevent the browning, but I just worked quickly and added some lemon juice on top of the apples.  I fully baked these at home and the night before.  After Thanksgiving dinner, I popped them in an oven safe dish and put them in the oven at 300º for several minutes to warm them back up.  

Baked Apple Pies: In an Apple

8 Granny Smith Apples
1 tsp cinnamon
1/4 c. sugar {I used baking splenda}
1 Tbsp brown sugar
Pie Crust {I used the Pillsbury refrigerated kind}

*8 Granny Smith Apples -
4 apples used to bake the pie with;
4 apples used to cut up for the apple chunks for the pie filling

Preheat oven to 375º.

Cut the tops of the apples off and remove the inside (core out) the apple.  You can do this with either a spoon or melon baller {be careful not to puncture a hole through the apple}.  I went ahead and tossed the inside of the apples down the drain - they were all in little pieces and browned before I was able to even attempt to save any of it to use for the pie filling.

*After removing the insides of each apple, I squirt some lemon juice on the inside, placed in a plastic ziploc baggie and put in the fridge until ready to use again.

Using the other four apples, cut up the apples in small pieces {remove skin}.  In a mixing bowl, mix the diced apples with the cinnamon, sugar, and brown sugar.  Spoon the mixture into each hollowed apple.

Roll out pie crust into thin strips and place a lattice {or any other type of pattern} across the apples.

Fill an 8x8 baking dish with just enough water to cover the bottom.
Cover with foil and bake for 20-25 minutes.  Then, remove foil and bake for an additional 20 minutes, or
until crust is golden brown.

*Optional step: once you take the apples out of the fridge, you can line the apples with some of the pie crust.  I used to top of a glass cup to cut a circle out of the crust and molded it to the inside of the apple before filling with the apple mixture.

Enjoy!!!

Monday, November 19, 2012

Pumpkin Pecan Pie: In a Jar


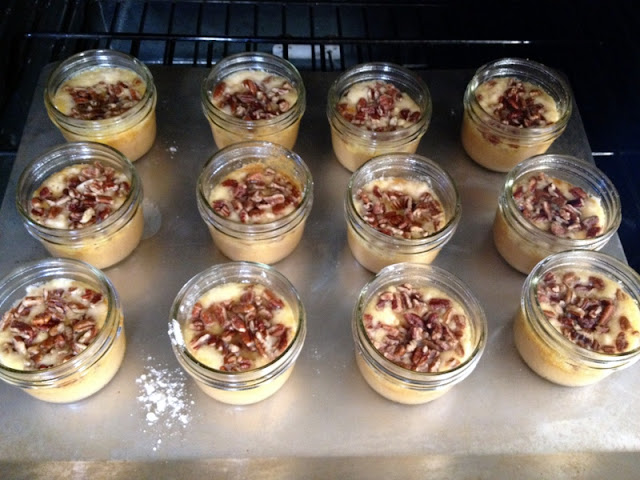
I can't remember how I originally stumbled upon this recipe. I had wanted to try out a dessert jar recipe for awhile and thought this one sounded delicious.  I went to World Market and bought some individual glass jars (they are very reasonably priced).  I grabbed 2 different sizes so that I could experiment with both.  I decided the smaller jars are more appropriate for individual desserts.  These little jarred pies are delicious and easy to make.  Desserts in a jar are now one of my favorite ways to bake little individual desserts.  You can get very creative and come up with some of your own ideas, too.  Mix and match all sorts of different recipes!

I followed the recipe that is below, the only thing that I did different was that I added the turkey on top of the pie.  I just used Pilsbury refrigerated pie crust and my stamper cut outs from William-Sonoma to make the turkeys.  I placed them on top of the pies about 7 minutes before they were done baking. 

Pumpkin Pecan Pie:
In a Jar
{source: Glorious Treats}


1-15 oz. can of pumpkin
1 can (12 oz) evaporated milk
3 eggs
3/4 c. sugar
4 tsp. pumpkin pie spice
1 pkg yellow cake mix
1 1/2 c. chopped pecans
3/4 c. butter, melted
whipped cream, cool whip, or ice cream for topping (when served)

Preheat oven to 350ºF.
 Place each jar on a cookie sheet and spray each jar with non stick cooking spray. 

In a large mixing bowl, whisk together pumpkin, evaporated milk, eggs, sugar, and pumpkin pie spice.
Fill each jar with about 1/2 cup of pumpkin mixture. 
Sprinkle 1-2 Tbsp of dry cake mix on top of the pumpkin layer.  
Then, sprinkle approx 1 Tbsp of chopped pecans on top. 
Pour 1 Tbsp of melted butter on top. 


Bake for approximately 40 minutes {insert toothpick in center of jar and if clean, then pies should be done baking}. 
**If adding a turkey or some other pie crust cut out on top, place on top of pies approximately last 7 minutes of baking.
Cool for at least 30 minutes before serving.  If not serving right away, I recommend placing them in the refrigerator. 

Enjoy!!!

I doubled the recipe and made enough for Chris to take to work for his co-workers and families.  I placed them all in a wicker tray, which allowed for easy transportation.   And I was pleasantly surprised several days later when he brought back the empty jars.  I thought it was so nice of everyone to return the jars!!


Have fun with this recipe!! And think about all the other options and types of pies or cakes you could bake in a jar! 

Friday, November 9, 2012

"The 'Best' Stuffing Ever"


I am such a fan of the holidays - Thanksgiving & Christmas.  Nothing makes me happier than spending time with family, relaxing, and cooking some good meals!  If you know me, my favorite dish at Thanksgiving is probably stuffing.  No one else is my family really loves stuffing, so when I was younger my mom would make the kind just from the box - you know, Stovetop.  I think I have pretty much grown up on Stovetop stuffing/dressing, but have always really liked it.

About 2 years ago, I stumbled upon a recipe for homemade stuffing on a blog that I frequent.  There are quite a few ingredients - which always steers me away from a recipe (I'm such a daring cook!).  However, I have always wanted to make the stuffing.  The name of it is quite catchy, "The Best Stuffing Ever".  I finally decided to tackle the recipe and it did not disappoint.  Although I'm not going to be making it for the actual Thanksgiving dinner this year, I think we may need to add it in next year!


The Best Stuffing Ever
{Adapted from: Picky Palate}


1 lb sourdough, cubed (I bought mine pre-cubed)
12 oz. baked cornbread, cubed
14 Tbsp butter
1 large onion, diced
2-3 cups diced celery
2 cups chopped carrots
2 Tbsp minced garlic
2 1/2 cups chicken broth
1/2 cup fresh chopped parsley
2 Tbsp fresh rosemary
1 Tbsp fresh sage
1/2 tsp ground thyme
1/2 tsp salt
1/2 tsp pepper
1 lb Jimmy Dean Sage Sausage


Preheat oven to 350ºF. Place cubed sourdough and cornbread on large baking sheet and bake for 20-25 minutes, until lightly toasted. Then remove from oven.

Melt butter in large rimmed skillet on medium heat. Saute onions, celery, and carrots for about 10 minutes, or until veggies are tender.  Stir in garlic and cook for another couple minutes.  Then pour in chicken broth, parsley, rosemary, sage, thyme, salt, and pepper.  Stir and reduce heat to low and simmer.

Brown sausage in skillet and drain.  Then add to veggie mixture.  Place bread cubes into a large bowl and slowly pour mixture over cubes, gently stirring throughout to ensure all pieces are coated evenly.

Spray large baking dish, 11x7, and bake for approx 25-30 minutes - just until lightly browned on top.  Remove from oven & enjoy!!

To view step-by-step instructions/original recipe -- Picky Palate - The Best Stuffing Ever

Wednesday, November 7, 2012

{Best Ever} Chocolate Chip Oatmeal Cookies


Before I started nursing school, I had to take a couple prerequisite courses - one of them being physiology.  Physiology was by far my favorite course.  I love understanding how and why everything works the way that it does.  I think another reason I loved the course so much was because of my amazing teacher.  She was so good at teaching the course and was able to teach to us so that it made sense to us (versus just memorizing material for an exam).  

Before each exam we had a study review in class.  At each review, she would bring homemade chocolate chip oatmeal cookies.  Everyone begged her for the recipe, but she said she wasn't going to give it out until the end of the course on the last review session (incentive for everyone to attend!).  She kept her promise and shared the recipe with us.  She got the original recipe from when one of her children attended some sort of summer camp.  She told us that she got the recipe, made it at home, and it tasted nothing like what she had tried.  She said she had contacted the people about the recipe and they gave her very detailed step by step instructions on how they put together the recipe.  From what she told us, she said that it is very important to mix this recipe by hand (no kitchen aid, no blender, etc) - just a good old fashion baking spoon!  

I don't have a picture of these cookies at this time.  I just really wanted to get this recipe saved somewhere so I don't lose it.  I still have it written down on the back of one of my review sheets - and there is vanilla, flour, etc. all over it! 

{Best Ever} Chocolate Chip Oatmeal Cookies

1 c. margarine (2 sticks), room temperature (I use Fleishmann)
1 c. sugar
1 c. brown sugar
2 eggs
2 c. flour
1 tsp. baking soda
1/2 tsp. baking powder
1/2 tsp. salt
1 1/2 tsp. cinnamon
1 tsp. vanilla (do not use imitation)
2 c. old fashioned oats
1.5 c. semi-sweet chocolate chips (I like to use the chunks by Nestle)

Preheat oven to 350ºF.

Mix together (not with mixer): margarine, sugar, and brown sugar - until well mixed.
Add in eggs and mix together.
Next, add flour, baking soda, baking powder, salt, and cinnamon.  Mix together until well combined. 
Lastly, mix in vanilla, oats, and chocolate chips. 

Drop mixture by spoonfuls onto baking sheet and bake for 8-12 minutes.  Take out of oven before fully "cooked" - you still want it a little gooey.  Let cool for a couple minutes on baking sheet, then transfer onto foil and place in freezer. 

I usually keep mine in the freezer and eat them cold.  But that's just my preference! 

Enjoy!!!

Monday, November 5, 2012

KSU vs. OSU Game

This weekend we were fortunate to find some tickets to the KSU vs. OSU game.  Currently, KSU is ranked #2 and have remained undefeated.  We went down for the game Saturday and had such a great time!! We hadn't been back to Manhattan for quite some time - and I hadn't been back for a football game in nearly 3 years.

We got down early afternoon, grabbed some lunch, then headed out to tailgate.
{Chris & I tailgating}
{Sean & Liz}


After several hours of tailgating we headed into the game.


{At the game}
{KSU vs. OSU, 11.03.12}

The game was a good one! It was a little close at the beginning but we pulled through and won by quite a bit.  After the 3rd quarter, we caught the shuttle from the tailgating area and headed to Aggieville.  Oh, Aggieville, how I missed you!!  Even though I feel kinda old there now, we still went out and acted like we were in college.


{Chris & I at Porters}

{Porter's, 11.03.12}

{Porter's, 11.03.12}

{Sean & Liz}

{Liz & I}

{Pat & Jenny}

{Sean & Liz}

 The weekend in Manhattan was so much fun. It makes me regret not going to a game earlier.  K-State remains undefeated and has 3 more games left until the end of the season!

Sunday, September 23, 2012

The First of Many

HAPPY FIRST ANNIVERSARY!! 
So excited to celebrate September 23rd each and every year with you.

{Wedding photos}
We had our cake at our wedding done by Icing on the Cake - we were both in love with the flavor of the cake, as well as the icing.  We loved working with Lynne and she did a beautiful job on our wedding cake and I am forever grateful to her!!  For a couple's first year anniversary, she complimentary offers a wedding cake top layer - that way you don't have to freeze the top of your cake and eat it covered in freezer burn.  We took her up on the offer and asked for a lemon cake.  The cake below is our "anniversary" cake.  Even though she only offers the first year complimentary, I know that we will order one and pay whatever for them in the years to come - because they are that good!!
{Anniversary Cake}

{One of my favorite pictures from our reception}

Chris scored some major points for how thoughtful his anniversary gift was.  He got me roses, a collage frame of some of wedding photos, a sweet quote/plaque, and my second wedding band.  I was beyond excited.    
{First Year Anniversary}
 Can't wait to see what the next year holds for the Williams' Family!

{Final shot of the evening at our reception}


 HAPPY ANNIVERSARY!!!

Wednesday, September 19, 2012

Recap: Annual Williams' Trip to CO

Chris' family has been going to Steamboat Springs, CO since he was little.  The past couple years we have been able to go as a family vacation.  Steamboat is a perfect getaway in the summer.  It's cool in the morning and nights and warm enough in the daytime to enjoy the weather.  There are lots of things to do there to stay busy, but we also like to spend time just relaxing and hanging out as a family.  

Normally, the trip has been planned in July; however, this year we went in September since no one had any school obligations.  It was the perfect time because all the families who vacation with young children had already gone back home since school has started, so there weren't a ton of people there.  The town was pretty quiet.  A quick recap of a few pictures:


{Emerald Lodge}
This is the lodge that we stay at each year.  It is beautiful!!

{Kitchen & Dining Area}
{Family Room}
{Family Room, door to back deck}

{Back deck}

{Chris & I room}

{Chris & I at top of mountain from gondola rides}


{Bloody Mary Breakfast for KSU game downtown}
{Morning walks}
{At the square}


{Chris being chased by a bear}


{View from back deck}


{Stagecoach}
Stagecoach is where we go fishing a lot.  Chris & his dad typically go almost every morning bright & early.  I usually pick a day or two to go with them.  They will spend hours out there! Beautiful lake! 


{Morning fishing at Stagecoach}


{Chris fishing at Stagecoach}

{Fishing at Steamboat Lake}
 The last day we were there, we went fishing at Steamboat Lake.  We fished off the dam.  On this day, I had a lot of luck.  I caught about 5 or 6 six fish, although, Chris didn't do his part in safely removing the fish from the hook and a couple of them got away.  I think I ended up taking about 3 home. 

{Instagram: Steamboat Lake}


{Chris & I rented bikes one day and rode them along the river and downtown}
 Steamboat Vacation 2012.