Friday, July 19, 2013

Mini Key Lime Tarts


A similarity between these mini desserts and my last post, Strawberry Jell-O Pretzel Salad, is that they are both perfect summer, fruit desserts.  I would much rather have something like this than a piece of chocolate cake in the summer.  These mini tarts are refreshing and the perfect size to satisfy your sweet tooth. 

You could easily make these into larger sized individual tarts, or use the batter to make one 
large tart. 

Mini Key Lime Tarts

2-4 pkgs of frozen mini phyllo tarts
1 (14 oz) can sweetened condensed milk
1/2 cup fresh lime juice, plus zest from 2 limes
2 Tbsp powdered sugar
4 egg yolks
2 cups whipped cream, or cool whip
8-10 key limes, sliced into coins to garnish

Preheat oven to 375ºF.

In a large bowl, whisk together egg yolks until blended.  Add in sweetened condensed milk, lime juice, lime zest, and powdered sugar.  Whisk together until smooth.

Place mini phyllo tarts onto a baking sheet.  Spoon batter into each mini tart until nearly overflowing (it will not spill over when cooked).  Bake for approx 12 minutes, or until custard has set.  Remove and let cool. 

Top with whipped cream, or cool whip.  Garnish with key lime.  Store in your refrigerator for up to 4-5 days.

Enjoy!!!

Sunday, July 14, 2013

Strawberry Jell-O Pretzel Salad


Strawberry Jell-O pretzel salad appears to be a dessert that has been around for awhile and I'm sure most of you have heard of it, or tried it.  I had not ever heard of it before seeing it around on Pinterest.  However, this is such a delicious summer dessert recipe!! Fruit, cool whip .... yum!  It's the perfect combination of sweet & salty.  I highly recommend making this before the summer is over!! 

The only downfall to this dessert is that it doesn't stay good for very long - the pretzels will start to get soggy after several days.  It would be a great dessert to take to a BBQ or potluck dinner. 

Tip for you: Follow the directions carefully, and in order.  Timing each step is important.  I learned the hard way and my jell-o had set a little too much before I poured it as the top layer.

Strawberry Jell-O Pretzel Salad

3 cups crushed pretzels
1 cup butter, melted
4 Tbsp sugar, plus 3/4 cup sugar
1 (8 oz) pkg cream cheese, room temperature
1 (8 oz) container cool whip (I always use the "Free" Cool Whip)
2 (3 oz) strawberry gelatin, Jell-O, packages
2 cups boiling water
2 (10 oz) pkg frozen strawberries (sliced)

Preheat oven to 400ºF.

For the crust: mix the pretzels, butter (melted), and 4 Tbsp sugar.  Press the pretzel mixture into 9x13 and bake from approximately 7-10 minutes.  Let crust cool.  (Make sure completely cooled before moving on the next layer). 

In a mixing bowl, beat together cream cheese and 3/4 cup sugar.  Once thoroughly mixed together, gently fold in the cool whip.

Once the crust is cooled, spread the cream cheese layer over the pretzel crust.  Make sure the cream cheese layer is spread evenly and is spread up against the edges of the pan - that will prevent the jello from leaking down into the layers.

Top layer/Jell-O layer: Boil 2 cups of water, then take off the burner and add gelatin mix - mix together well.  Add in the strawberries and let it cool for just a couple minutes - you want slightly thicker consistently, i.e. that of an egg white.  Once that is achieved, pour Jell-O mix on top of cream cheese mix.

Refrigerate for 3-4 hours, until well set.

Enjoy!!!

Wednesday, July 10, 2013

Tex-Mex Sloppy Joes


Yesterday, I told my mom I would fix her dinner - I gave her a couple good options to choose from and she chose the Tex-Mex Sloppy Joes ... Probably because I raved about them the first time I made them.  I like sloppy joes, but they have never been a favorite, or a "go-to" dinner, of mine.  I came across this recipe though and was intrigued.  I love tex-mex food and flavors!  I think it will become a "go-to" dinner in our house.  My mom was impressed by it and Chris enjoyed it, as well, the first time I made it.  Also, it makes great leftovers! 

Tex-Mex Sloppy Joes
{Original Recipe: Kitchen Meets Girl}

1 lbs ground turkey {or ground beef}
4 slices of bacon, cooked and chopped
1 onion, chopped
2 jalapeno peppers, chopped
3 garlic cloves, finely chopped
1 Tbsp chili powder
1 1/2 tsp ground cumin
1 1/2 tsp ground coriander
1 cup beef broth
1 cup tomato sauce
1 Tbsp brown sugar
2 Tbsp Worcestershire sauce
1 Tbsp apple cider vinegar
1 Tbsp hot sauce 
Optional to add: Fritos, pico de gallo, corn salsa

Cook bacon according to package, then chop, or break up, into small pieces.
Brown ground turkey over medium-high heat in a large skillet pan.  Once cooked, add in bacon, onion, jalapeno, garlic, and spices.  Cook until onion is softened, approx 5 minutes.

Combine remaining ingredients together in separate bowl: beef broth, tomato sauce, brown sugar, Worcestershire sauce, vinegar, and hot sauce.  Pour over ground turkey mixture and simmer until the liquid slightly reduces, approx 5-10 minutes.  If after 10 minutes, sauce is still runny, bring to a slight boil and continue to let it reduce.

Spoon mixture onto hamburger buns and top with any additional toppings you may like!  
{I always like to add fritos}.

Enjoy!!!

Monday, July 8, 2013

Slow Cooker Pot Roast Sandwich


Chris & I got back from the lake late Saturday night.  On Sunday, we spent the day getting unpacked and settled.  We had both been off of work for the last week.  Sunday afternoon I wanted to make something quick and easy for dinner.  I didn't want to spend my day in the kitchen and the temperature outside has been getting hotter and hotter.  I found this easy recipe on one of my "go- to" blogs - Six Sisters Stuff. 

This recipe is delicious!  I was a bit unsure of how it would turn out, but Chris & I were both very impressed.  I think I was even more excited to have it as leftovers for a meal!  

Slow Cooker Pot Roast Sandwich
{Original Recipe: Six Sisters Stuff}

1 3-4 lb beef roast {I used a 3lbs, "bottom" roast}
1 cup water
1 cup salsa
1 envelope onion soup mix
1 envelope Italian dressing mix
1 envelope Au Jus mix

Spicy Sauce {See below}
Swiss cheese slices
Buns

Whisk together water and salsa, then add in the 3 mixes - whisk together until well mixed. 
Place roast in slow cooker.  Pour seasoning mixture on top of roast.
Cook on low 6-8 hours, or high 3-5 hours {time may vary depending on each slow cooker}.

While the roast is cooking, you can make a spicy sauce to spread on your sandwich for added flavor. 

Spicy Sauce

1/4 cup sour cream
2 Tbsp chili sauce
2 tsp horseradish sauce

Mix together.  Chill in refrigerator. 

Once your roast has finished cooking, take out of crock pot and slice up/shred to pieces.  
Turn your broiler on - place Swiss cheese one half of the bun and broil until melted.
Top the other half of bun with spicy sauce and then add your beef in between.

Enjoy!!! 


Sunday, July 7, 2013

Soft & Chewy Chocolate Chip Cookies


These chocolate chip cookies are based off of the base recipe for the Snow Day Cookies I made a couple months ago.  The secret ingredient: cornstarch.  The other secret: under baking them.  

Baking them for the recommended time is about 8-9 minutes.  When you check on them at that time, you want them to not be "firm", but at a spot where you may question to bake another minute or two.  But, if you want them really soft, then take them out of oven and let them sit on the cookie sheet for several minutes to cool (about 10 or so).  Once they are cooled, I transfer them to the freezer and keep them in the freezer.  Then, when you want a cookie, just pull it out of the freezer and it will be ready to eat - it won't be so hard that it seems frozen, or that you want to let it sit out for several minutes to soften up.  Another piece of advice: when baking cookies, do not place uncooked dough on hot/warm baking sheets.  It's best to invest in a couple baking sheets and rotate between each batch. 

For more information on how to bake soft cookies, head over to Sally's Baking Addiction and read up!

Soft & Chewy
Chocolate Chip Cookies

{Original Recipe: Sally's Baking Addiction}

3/4 cup (1.5 sticks) unsalted butter, softened to room temperature
3/4 cup dark brown sugar
1/4 cup sugar
1 egg, room temperature
2 tsp vanilla extract
2 cups flour
2 tsp cornstarch
1 tsp baking soda
1/2 tsp salt
1 1/4 cup semi-sweet chocolate chips

Line baking sheet with parchment paper and set aside.

Using a mixer {either hand held or stand}, cream together butter and sugars on medium speed until fluffy and light in color. Mix in egg and vanilla. 

In a separate bowl, combine flour, cornstarch, baking soda, and salt.  On low speed, slowly mix into wet ingredients.  Stir in chocolate chips.  Then, chill your dough for at least 30 minutes.

Preheat oven to 350ºF.

Once dough is chilled, drop 1 Tbsp sized ball of dough onto baking sheet.  The dough may be sticky to work with.  Bake for 8-9 minutes.  After baking time is completed, let cookies cool on baking sheet for several minutes - then, if desired, transfer to freezer to store.  
{May be stored out of freezer, as well}

Enjoy!!!

Saturday, July 6, 2013

Our Fourth

Chris & I both took the week of July 4th off - having a week off togehter and being in town has not happened since.... I can't even remember!  We had a long list of things we wanted to get accomplished; however, that list still exists! :)  We ended up spending about 4 days down at the lake.  It was nice & relaxing.  We always appreciate the invite from the Donahoo's to come to their lake house.  


View from back patio/poolside over looking the lake

07.04.13

Boating


Amy & I poolside


Beer Pong


Thursday, April 11, 2013

Carrot Cake Pie

If you have ever made a "cake pie", I'm sure you would agree that they are very addicting.  A couple years ago for Thanksgiving I made a "cake pie" and it's one of my favorite types of pie desserts.  This carrot cake pie I made for Easter dessert, as well.  This was definitely the family favorite.  Between my sister and I, it's pretty safe to say that carrot cake is one of my favorite all-time desserts and red velvet is hers.  However, she may have converted {but probably not complete} after having carrot cake pie.  Everyone must give this recipe a try! 

Carrot Cake Pie
{Original recipe from: Crazy for Crust}

     1 premade pie crust {or you can use your favorite homemade recipe}
1 cup flour
1/2 tsp baking powder
1/8 tsp baking soda
1/4 tsp salt
1 1/2 tsp cinnamon
1/8 tsp ginger
1/4 cup butter, melted
1 tsp vanilla
1 egg
1 cup shredded carrots

For the frosting:
1/4 cup white chocolate chips
5 oz cream cheese
1 Tbsp butter
1/2 tsp vanilla
3/4 cup powdered sugar

Preheat oven to 350ºF

Line a pie pan with pie crust, crimping the edges

Combine:  flour, baking powder, baking soda, salt, cinnamon, and ginger in mixing bowl. Then, cream together butter and sugar with mixer, then stir in eggs and vanilla until combined

Stir dry ingredients into wet until combined.  Fold in carrots
**Note: the batter will be very thick and it isn't a large amount, either. 

Pour batter into pie crust and bake for 25-30 minutes - until top is set and toothpick comes out nearly clean.  If edges of pie crust start to brown, cover with protector or aluminum foil. Cool completely before frosting.

Frosting:
Melt white chocolate chips in a small bowl in the microwave on 50% at 30 second increments, until melted.  Let cool slightly.

In a separate bowl, beat cream cheese and 1 Tbsp butter with mixer until creamy.  Then, beat in melted white chocolate.  Stir in vanilla.  Slowly beat in small amounts of powdered sugar, until well combined.  Frost the pie how you would like - you can either spread a layer on top, or use a piping tip to decorate.

*My photo was taken before I frosted it.  I used a piping tip to add the frosting.

Enjoy!!!

Tuesday, April 2, 2013

Coconut Cream {Easter} Pies


While hunting for what I was going to bake for Easter dessert, I came upon several recipes that sparked my interest.  I finally narrowed it down to 2 - Coconut Cream Pies and Carrot Cake Pie.  Deciding between the two recipes was near impossible because Chris's favorite dessert is coconut cream pie and my favorite dessert is carrot cake.  I asked my family what sounded good and their reply - "Both sound good!" I decided to make both.  The coconut cream pies were baked individually  which worked well for smaller portions.  You could put the recipe together and make one large pie, I guess.  

The recipe for the coconut cream pies can be found in the cookbook Desserts in a Jar.  Chris and Laney got me the cookbook for Christmas and is filled with all sorts of fun recipes!  I also found the recipe on Crazy for Crust's blog {love this blog, by the way!}.  I followed the directions step by step, but somehow my pudding mixture was still soupy after several hours of being chilled.  So, I had to adapt the recipe a bit.  I added in approx 1 1/2 pkg of coconut cream instant pudding mix {by Jell-O}.  So... if you encounter the same problem, just make sure you have some coconut cream instant pudding on hand to help thicken it up!  

Also, I did not make the meringue topping.  I simply used fat-free, sugar-free cool whip.  If you are interested in making the meringue topping, you can follow click on the link above to Crazy for Crust and find the instructions there. 

*The colored ramekins were purchased at World Market (only $1.95 for each).

Coconut Cream {Easter} Pies

1 pkg refrigerated Pilsbury pie crust
3 c. milk {I used skim}
2/3 c. sugar
5 large egg yolks
1/4 c. cornstarch
2 tsp vanilla extract
1/2 tsp coconut extract, optional
1 c. coconut, plus extra for toppings
Fat-free, sugar-free Cool Whip
Mini easter egg candy -
{I used Cadbury mini eggs for some and M&M eggs for others}
 6-8 Mini ramekins or glass jars

Roll out pie crust and bake in bottom of ramekins per instructions on box.
*I had some extra pie crust, so I baked it on a baking sheet and then crumbled it on the bottom of each ramekin

In a large {heatproof} bowl, whisk together egg yolks and sugar.  Whisk togehter {by hand} until smooth, will become light yellow in color.  Set to side.

In a medium sized sauce pan, add milk and cornstarch.  Set over medium heat until bubbles begin to form around the edges, stirring constantly {about 5 minutes}.  While the mixture is hot, pour approximately 1/2 cup into the bowl with the egg yolks and sugar - whisk together to temper the eggs.  Then, whisk in approximately another 1/2 cup of the hot milk mixutre into the eggs.  Pour the entire egg/milk mixture back in the sauce pan.  Place back on medium heat and continue heating until it thickens {approx 2 minutes}. 

Remove from heat and add in vanilla extract, coconut extract {if desired}, and coconut.  Place pudding mixture into fridge for several hours to continue to thicken and chill. 

If your mixture is not thick enough, or pudding-like, add some coconut cream instant pudding mix until it is thickened to your liking, I used approx 1 1/2 small pkgs of the instant pudding mix. 

In a small pan, over medium heat, add coconut - stirring constantly {can burn easily} until toasted and browned. 

Divide pudding mix evenly into ramekins.  Top with cool whip, sprinkle with toasted coconut.  Add mini easter egg candy, if desired. 

Enjoy!!!

Saturday, March 23, 2013

Skinny Funfetti Cupcakes


Whether you are baking a cake or cupcakes, an easy "skinny" substitution is to use some sort of diet soda versus the eggs and oil.  I don't feel it takes away flavor, nor does it really dry it out.  I think it's a great way to cut back on some calories {go ahead, have a seconds!}.  These cupcakes use Diet Sprite.  If you are baking a darker cake {chocolate, devil's food}, I would suggest using Diet Coke or Diet Dr. Pepper.  This cupcake recipes not only uses a 'healthier' version for the cake part, but also the icing.  Chris thought they were really good and was surprised when I told him how the icing was made.  Hope you enjoy!!

Skinny Funfetti Cupcakes
{Source: Six Sisters' Stuff}


1 pkg Funfetti cake mix
1 can Diet Sprite

Frosting:
1 tub {8 oz} sugar-free, fat-free Cool Whip
1 small pkg sugar-free vanilla Jello Instant Pudding

Preheat oven to 350ºF.  Line muffin pan with cupcake liners.

In large mixing bowl, mix together cake mix and Diet Sprite until smooth, no lumps.  Evenly distribute in cupcake liners.  Bake for approx 20 minutes.  Let cupcakes cool completely before frosting.

To make the frosting: mix together Cool Whip and vanilla pudding, using a whisk or electric mixer.  Mix together until smooth, no lumps.  Evenly frost cupcakes {make sure cupcakes are completely cooled before frosting, or else it may make the cool whip runny}.  Store in refrigerator!

Enjoy!!!

Friday, March 15, 2013

One ... Two ... Three ... Four ... Margarita!


These margaritas are a staple in our house during the summers.  Both Chris & I enjoy a good margarita - we are both pretty picky though.  I hate margaritas with the premade margarita mixes. 

These margaritas had only 4 ingredients - super simple!  Hence the name, {Easy As} 1, 2, 3, 4 Margaritas!  Also, if you have 4 of these margaritas, then you will confirm the truth behind: One margarita, two margarita, three margarita... Floor.

These would be great for Cinco de Mayo!!

If you prefer your margarita frozen, then just mix this ingredients into a blender, add some ice, and blend.

{Easy As}
1 ... 2 ... 3 ... 4 ... Margarita!


12 oz. frozen limeade concentrate
12 oz. gold tequila
12 oz. triple sec
12 oz. water
Limes {optional}

Dump the frozen limeade concentrate into a margarita pitcher.  Fill the empty limeade can with tequila and pour into pitcher.  Repeat with the triple sec and water.  Stir until the limeade concentrate has melted and all ingredients are well mixed together. 

Enjoy!!!

Thursday, March 14, 2013

Circus Animal Cookie Truffles


These cookie truffles are incredibly easy to make!  They are much less time consuming than normal cake ball truffles because it doesn't require you to bake a cake!  I think it would be fun to experiment with other pre-made cookies (I have done the oreos before and those are delish!).  This recipe can be used with either cream cheese or cream cheese frosting.  I did the frosting because I read that it tastes better than the cream cheese.  To be honest, they are a little sweet - but they are tasty!  I think the cream cheese filler would help to make them less sweet.  So, if you prefer something a little less sweet, then you could try the cream cheese filling instead. 

Also, the measurement on the ingredients is flexible, too.  I bought my ingredients at Target and they were all out of the bags of the frosted animal cookies, so I bought 2 boxes of the Target brand.  I ended up mixing about 16 oz of animal cookies and 1 can of frosting.  But this can easily be reduced by half. 

Circus Animal Cookie Truffles

Approx 16 oz of Circus Animal Cookies
1 tub of cream cheese frosting
Almond Bark, or Wilton's Candy Melts (found at Hobby Lobby)
Sprinkles

Using a food processor, grind up the animal cookies to fine crumbs.  Pour all crumbs into a large bowl. 
Add 1 tub of cream cheese frosting and mix thoroughly with a spoon. 

Place truffle mixture in fridge for at least 30 minutes {optional} - making the mixture a little more firm makes it easier to roll.

Roll into equal sized balls and place on baking sheet {covered with parchment paper or foil}.  Place in fridge for 3-4 hours, or freezer 1-2 hours - until firm.

Melt almond bark, or candy. Using a spoon, dip each ball into melted chocolate - tap excess off against side of bowl.  Place on baking sheet & pour sprinkles on top.  Place in fridge for several hours, until chocolate hardens. 

Store in fridge for up to 1 week. 

Enjoy!!!

*When dipping the  balls into the chocolate, work quickly so that the chocolate doesn't harden up too much. Also, after each ball is dipped, immediately decorate with sprinkles so that the sprinkles will stick to the melted chocolate. 

**I used both white almond bark and Wilton's candy for my truffles.  I used white almond bark and dipped several balls into that - then, I added hot pink gel food dye {the gel dye works so much better} and dipped several balls into the hot pink.  Lastly, I used the Wilton's Candy Melts in the light pink color.  I buy my Wilton's Candy Melts at Hobby Lobby {or at Michael's, JoAnn's}. 

Here's a link to what the Candy Melts look like:

Here's a link to the gel dye that I use:

Monday, March 4, 2013

Thank You, Ashley Ella Design


A big 

to Ashley, with Ashley Ella Design, for helping me create my new blog design and for putting it all together!  I appreciate all your hard work!  

Ashley & I have actually known each other since elementary school and we used to play basketball together.  {We didn't go to the same school though}.  Sometime during high school, we pretty much lost contact with each other.  I happened to stumbled upon a Facebook post of hers about creating blog designs.  I contacted her for some more information and took a look at her portfolio - I loved the other blogs that she had designed.

She was so easy to work with and very prompt about getting things done {and even replying to emails}.  I appreciate all your work!

If you are thinking about creating a new blog design, please check out her webpage and contact her.  You will be so happy you did! 
Here's the link to her webpage:

ashley ella design


You can also check out her store on Etsy {which can be navigated through her webpage}

Thank you so much, Ashley!  I love how everything turned out! 

Monday, February 25, 2013

Snow Day Cookies


I have been wanting to make these cookies for awhile because the base for these cookies are a little different than most.  The recipe uses corn starch, which I guess creates the thickness and fluffiness of these cookies.  They are also super soft and chewy - which I read is created by the higher ratio of brown sugar to white sugar (who knew?).  Anyways, they are really good and I am anxious to use this base for different types of cookies now!  

These were the perfect cookies to make today because it was snowing this afternoon (and the cookies have Snocaps in them!).  Snocaps are not a candy that I have ever bought.  I couldn't even tell you the last time I had one.  So, when I went to the store to go purchase them, I couldn't find them.  I tried Target, Wal-Mart, & Hy-Vee.  I mentioned something to my dad about it and was able to find some at Walgreens (thanks Dad!).  If you do not have all the baking chips that are listed in the recipe, feel free to use whatever you have on hand - anything will work!  I used dark chocolate, semi-sweet, and white chocolate (hence, the name triple choco-chip). 

Snocap Triple Choco-Chip Cookies
{Adapted from: Sally's Baking Addiction}

3/4 c. unsalted butter, room temperature
3/4 c. dark brown sugar (light brown sugar works too, but dark is preferred)
1/4 c. sugar (I used baking splenda)
1 large egg, room temperature
2 tsp. vanilla
2 c. flour
2 tsp. cornstarch
1 tsp. baking soda
1/2 tsp. salt (I only used 1/4 tsp)
1/2 c. semi-sweet chocolate chips
1/4 c. dark chocolate chips
1/4 c. white chocolate chips
1/2 c. Snocaps

In a large bowl, mix together (with a stand mixer or hand mixer) butter and sugars, until well combined and fluffy on medium speed.  Then, mix in egg and vanilla. 

In small separate bowl, add flour, cornstarch, baking soda, and salt. Simply stir ingredients together. 

Slowly add in flour mixture to large bowl with butter, sugars, egg, and vanilla - mix together on slow speed until well combined.  Then, stir in chocolate chips and snocaps. 

Refrigerate dough for minimum of 30 minutes -- you can refrigerate dough for up to 3 days.  I wrapped mine up in that press-n-seal wrap and let it chill for about 2 hours.  

When ready to bake cookies, preheat oven to 350ºF.  Use parchment paper or a baking sheet to bake cookies on.  Scoop about 1.5 Tbsp of dough onto sheet for each cookie (slightly flatten out -- just a little bit, though!)  

Bake for 8 minutes.  They may appear slightly under cooked, but do not let them crisp at all!  I just let mine sit on the baking sheet once out of the oven for a couple minutes then remove to cool. 

The recipe states - Do not drop dough onto warm cookie sheets to bake.  Make sure the cookie sheets are completely cooled before baking. 

Enjoy!!!

Favorite Things: Baking Essentials


Since baking is one of my favorite things to do and I have a lot of desserts and baked goods that are on here, I thought I would share a few of my favorite things.  I buy a lot of my kitchen stuff and baking supplies at Sur La Table (favorite store!) and Crate & Barrel - my top 2.  Other stores I frequent include: Pier 1 Imports, Bed Bath & Beyond, and William-Sonoma. 

A Few of my Favorite Things


{1} Pier 1 Glass Chalkboard Jars - these jars are fabulous! Not only are they practical, but they are stylish and affordable!  I use them for flour, sugar, etc.  I highly recommend these glass jars, but any type of a jar or container for your ingredients is a must have. 

{2} Kitchen Aid Stand Mixer - I know these are pricey, but they are worth it if you bake and cook a lot.  There are all sorts of attachments you can purchase, which creates all sorts of ways you can use this.  I love my mixer - the only thing that is unfortunate is that I don't have much counter space or storage in our kitchen for it.  However, Chris knows how much I want an appliance cabinet in our next house! :)  And that will allow for it to be more convenient for me to use!

{3} Adjustable Pie Crust Cover - if you bake pies a lot, definitely go out and purchase one of these!  It will prevent your crust from burning.  The adjustable ones are highly recommended because you can use them on all different sizes.  I used to try to wrap my crusts with foil, but this works so much better!

{4} Baking Mat - I purchased this from Crate & Barrel and it's wonderful.  Another popular one is the Silpat ones which you can find at Bed, Bath  & Beyonds, Kohls, Target, etc.  Plus, they are dishwasher safe, which is always a perk! 

{5} Spatula Spoon - I recently purchased this from Sur La Table and love it.  I need to get another one! I use it for baking and cooking.  It's super strong and is great to mix things with or scrape bowls.  (Also dishwasher safe!)

{6} iPad Easel - my sister bought this for me from Bed, Bath & Beyond and it comes in handy.  I find a lot of my recipes online, so if I haven't printed it out then I use the iPad to follow the recipes. 

{7) Parchment Paper - I don't know how I just discovered parchment paper in the past year.  It's amazing! I use it mostly for baking with cookies but it allows for easy clean up and it helps protect cookie sheets.  It won't burn your cookies either.  You can purchase this at any kitchen store, Target, or even your local grocery store. 

{8} Brown Sugar Terracotta Bear - Before I put this bear to work, I used to go gather my ingredients for what I was going to bake only to find that my brown sugar is rock hard.  I now use these terracotta bears to prevent that from happening and to keep my brown sugar fresh.  I have 2 of them because I have both light brown sugar and dark brown sugar in my cabinets. 

{9} Marble Pastry Board - I just got this for Christmas this past year.  If you are looking to purchase one, I recommend the one from Sur La Table.  I found that it is the most reasonably priced, it's a great size, and great quality.  The only problem is that is weighs a ton!  I keep it in the basement at this time because it's too large to store in our kitchen and it's pretty heavy to haul up and down the stairs.  I use this when I'm baking with pie crusts mostly.

{10} Better Batter Whisks - recent purchase from Sur La Table, as well.  These work as whisks, spoons, and a beater.  It is great for mixing ingredients and keeps your mixture fluffy.  (Dishwasher safe, too!)

{11} Cookie Spatula - these are nice to have to transfer cookies after baking them.  It prevents cookies from crumbling or falling apart. 

{12} OXO Non Slip Mixing Bowls - I got these bowls at one of my bridal showers and they are from Bed, Bath & Beyond.  They are coated in a non slip material, which is great when your mixing ingredients.  They are very durable, too.  Another perk, once again, that I love is that they are dishwasher safe!!


Those are just a few of my favorite things that I have for baking that I would recommend.  As you can see, I love gadgets and tools that are dishwasher safe.  It is always a nice option to have!  One more thing I recommend that I don't have in the picture is regarding your cookie sheets - make sure that you invest in some nice cookie sheets - it will make such a difference!! As well as other bakeware - pie pans, bread pans, cake pans, etc.  

Saturday, February 23, 2013

Snow Day

It snowed about 8-10 inches on Thursday.  Unfortunately, I had to work both Thursday and Friday.  It wasn't too bad getting to and from work.  Chris was kind enough to take me and pick me up each day.  Also, the streets were plowed pretty good by the time I got off work Thursday, which made the drive do-able.  I love snow a couple times each winter; but, I don't love snow when I have to work -- hospitals don't close, so we never get a snow day.  


This little lady loved the snow:


She had a blast running around in it!  Chris & I would make snow balls and throw them - she loved chasing after them and she would try to attack the snow ball.  Some of the photos are so funny - she looks like such an attack dog. 


{Aren't you going to throw it again, dad?}


It's supposed to snow again on Monday & Tuesday, so I'm sure there will plenty more play time in the snow! 

Wednesday, February 13, 2013

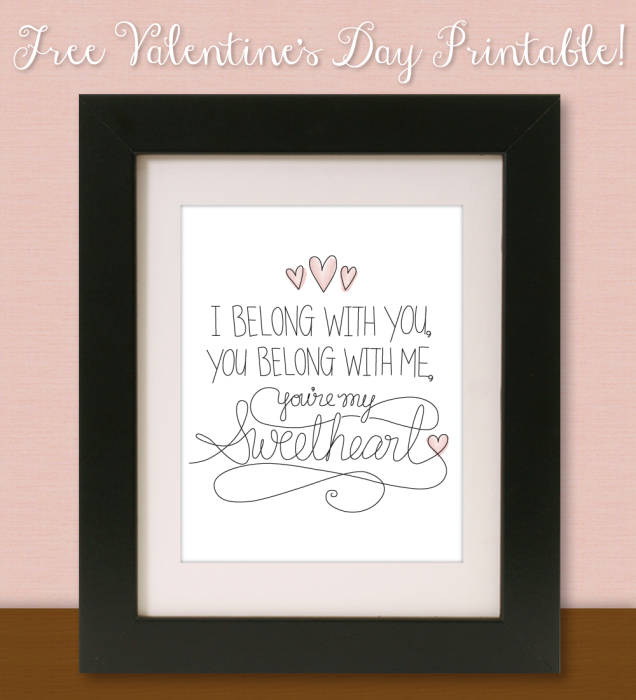
You're My Sweetheart: Valentine's Day Free Printable

I Belong With You, You Belong With Me, You are My Sweetheart - FreeValentine's Printable
{Source: Valentine's Day Free Printable}
How cute is this?  And I love this song, too! 


A free printable to decorate a little for Valentine's Day.  You can download this print for free, here: Sweetheart Free Printable

Monday, February 11, 2013

Impress Your Honey: Easy Red Velvet Whoopie Pies


While grocery shopping a couple days ago, I stumbled upon a limited edition Pillsbury cookie dough - Red Velvet.  I am not one who loves to make cookies from cookie dough.  I would rather put in the extra elbow grease and bake them from scratch.  However, I picked up a roll of the dough to try out.  Also, my sister is a huge fan of red velvet desserts - it's her favorite - so, I knew she would be excited to try these out.  These whoopie pies are so easy to make!  Like I said, the dough is a premade dough and the icing that I used in the center is also Pillsbury.  While they may look a little fancy, they are the easiest things to make!

The only ingredients you need: 

Red Velvet Cookie Dough & Easy Frost Icing

Impress Your Honey:
Red Velvet Cookie Whoopie Pies

1 pkg of Red Velvet Cookie Dough
1 can of Easy Frost Icing

Bake cookies according to package. 
Once cooled, fill the center with icing and sandwich two cookies together.

Optional: Decorate with sprinkles, sugar crystals, etc. 

Enjoy!!!

Saturday, January 26, 2013

Red Velvet Trifle


For Laney's birthday this year, we had our families over again for dinner.  One of the desserts I made included a trifle that my aunt originally gave me a recipe for.  It's one of my sister & I's favorite desserts.  The best part is that you can make it the day or night before and will actually taste better the next day!  It's a great dessert if you know you will be in a time crunch on the day of an event or anything.  It's super easy to make, too!!

Red Velvet Trifle

1 pkg Red Velvet Cake Mix
1 can sweetened condensed milk (I used fat free)
1 c. milk
1 large packet of instant vanilla pudding 
1 large container cool whip, thawed (I used sugar free/fat free)
1/4 c. kahluha
Hershey syrup

Bake cake according to directions on box in 13x9 pan.  When done, take out of oven and immediately poke holes over top of cake (I used the tip of a wooden mixing spoon).  Pour 1 can of sweetened condensed milk over the top and let it cool thoroughly.  

Mix together milk and kaluha, then add in pudding and whisk all together.  Gently fold in cool whip and mix thoroughly. 

Cut the cake in half and tear or slice pieces off and place in bottom of trifle bowl.  Drizzle hershey syrup over cake layer.  Then, top of half of the pudding mixture.  Repeat each layer.  Top the trifle with chocolate chips, chocolate shavings, raspberries - whatever you prefer! 

Again, it helps to make it the day or night before.  But if you are unable to, it will still taste delicious! 

Enjoy!!!

Monday, January 14, 2013

Orlando, FL (Day 1 & 2)

A couple months ago, Chris & I had purchased flights to Miami for the possibility of KSU going to the National Championships.  Many KSU fans had bought tickets in advance; however, after losing to Baylor, KSU was no longer eligible for the National Championship game.  Chris went ahead and had our tickets credited, but my sister thought it would still be fun to go to FL.  She and her friend had originally bought tickets to Orlando, because at the time it was cheaper to fly to Orlando than Miami.  So, they had planned on just renting a car and driving to the game.  However, they decided to keep their tickets to Orlando and just make a vacation out of it - visiting the parks.  I hadn't been to Disneyworld since I was in 6th grade I think.  My family used to go almost every year {up until about 6th grade}.  I was anxious to go back to see if it was similar to what I remembered it as.  

We ended up leaving for Orlando on Wednesday morning and came back the following Tuesday morning.   It was a great trip, and we celebrated my sisters 30th birthday on Friday.  She did the World Tour at Epcot - you travel to all the different "countries" and drink.  She loves different kinds of beers and specialty drinks and was so excited to be able to knock this off her list of things to do! 


Day 1: Universal Studios 

The first day we went to Universal Studios.  "Harry Potter Land" is a part of Universal, which I think my sister & Ashley were most excited about.  I have never seen any of the movies or read any of the books, so it didn't really have much special meaning or excitement to me.  It was actually a bit ridiculous - we had to wait a couple hours to get into the Harry Potter part since it was so crowded and once we got in, it remained crowded - lots of people!  But, it was still a fun day!! 

Universal Studios


Entrance to Universal Studios 

Harry Potter Ride

Harry Potter Ride 

Roller Coaster in Harry Potter World

Universal Studios

Universal Studios

"Blues Brothers Band"

Day 2: Epcot


Friday, January 4th
On Friday, for Kristin's birthday, we went to Epcot (which is one of her personal favorite places).  She wanted to do the World Tour at Epcot, which is where you drink in each country at Epcot.  She had a great time and she loved all the different, authentic drinks.  She finished strong - despite the crappy weather.  It was rainy, dreary and cold!! I spent over $100 just on clothing to keep me warm at the park.  But now,  I have an awesome Disney World Fleece (insert sarcasm)

HAPPY 30TH BIRTHDAY KRISTIN!!

HAPPY BIRTHDAY!!!

Birthday Princess

THE WORLD SHOWCASE TOUR


Epcot's World Showcase is made up of 11 countries: Mexico, Norway, China, Germany, Italy, USA, Japn, Morocco, France, United Kingdom, and Canada.  We went around to each country and in each country, Kristin got at least one drink (authentic drink for that country).  I had a couple drinks, but many of the drinks they had to offer were not drinks that I was very fond of.  Here's a quick recap of the tour: 

{1}

Mexico

Drink: Corona Light


{2} 

Norway


Drink: Coffee with Baileys


Norway
{3}

China


Drink: Tsingtao Lite


{4}

Germany


Drink: White Wine Flights


Ashley enjoying some wine

The little bar that we purchased the wine at 

At the gift shop after the wine flights, she would try anything on we suggested.
It all looked so good!


{5}

Italy


Drink: Chianti


Italy was quite memorable, right Kristin & Ashley??  We were all starving so we stopped in at an Italian restaurant.  I can't remember our servers name (okay, my sister has informed it was Stefano, but that name doesn't fit him as well), but I'm pretty sure we nick named him "B.O." - he smelled something like that.  And he wasn't quite up to par on his serving skills.  Oh well, it was a good memory, right?  It only cost a pretty penny for a slice of lasagna. 

{6}

United States of America


Drink: Bud Light
*Kristin actually drank her Bud Light later at dinner.  We passed this stop up on the tour at Epcot. 


Bud Light (at Smokey Bones)


{7}

Japan


Drink: Sapporo 


{8} 

Morocco


Drink: Sangria & Casa Beer


Morocco - raining


{9}

France


Drink: 1664 by Kronenbourg


{10}

United Kingdom

Drink: Strongbow Cider Beer


{11}

Canada

Drink: Moosehead Beer

Finished out strong!!


Congrats!!!
Congrats to finishing all 11 countries!! Unfortunately, I don't have anything saved from France!  I don't remember the drink of choice either!  It was a fun day, despite the rain and cold! Happy 30th Birthday!!